How to Texture Drywall Like a Pro
Whether you’re building a home from the ground up or you’re renovating a single room, there’s no shortage of time, effort, and expertise that goes into a drywall installation. From finding the studs to applying that final layer of texturing, you need the right knowledge, materials, and equipment to successfully accomplish the task.
Although drywall texturing can be outsourced to industry professionals, there’s certainly a way to save some money by doing it yourself. Learn how to texture drywall like a pro with this guide from American Spray Technologies. Contact us for more helpful tips and tricks — as one of the nation’s top providers of spray rigs and texture machines for contractors, you can be confident we know how to get the job done right!
Basics on Drywall Texturing
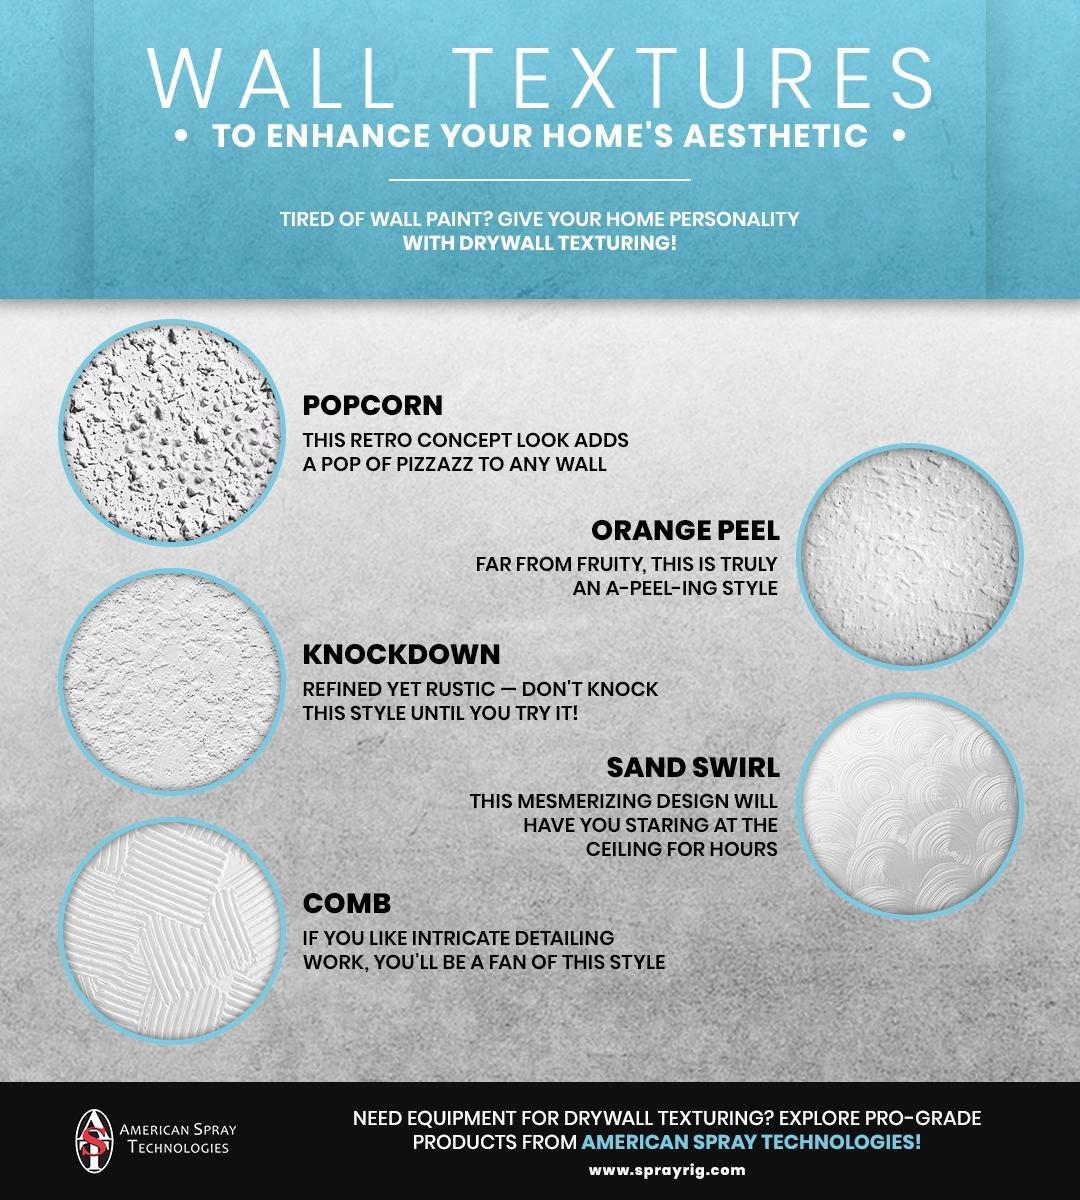
Adding texture to drywall is an effective and aesthetically appealing way to enhance the value of your home. There are a few different techniques you may use to execute this task, and some require equipment like spray rigs while others may be applied by hand. Common methods of drywall texturing include popcorn, orange peel, and stucco varieties. You can maximize efficiency by using a texturing machine, but paintbrushes and rollers can be employed as well!
Prep Your Surface & Materials
Before you start applying any layers of texture, be sure that all surfaces to be covered are smooth, wiped clean, and dry. If you notice any sections with serious protrusion or indentations, a drywall sponge is a great way to “sand” down the bumpy parts of your build while avoiding the dust from a traditional sander. Although drywall texture is a great way to cover up imperfections, you’ll save yourself a lot of time and hassle by minimizing the need to go back and redo sections that have been applied to an uneven or dirty surface.
Once all the drywall areas you plan to texture have been primed, it’s time to get your materials ready for action! The most common materials used for this DIY project are joint compound and drywall mud. You should be able to find both of these at your local improvement store. After applying your joint compound, get your drywall mud prepared by mixing it with a bit of water, just until it reaches the consistency of a thick batter. Mixing it too thick will be like spreading gravel on a vertical surface, whereas adding too much water will cause the mud to drip and dribble like watercolor paint.
Now that your walls and materials are good to go, it’s time to start the actual texturing process! We’ll review the primary techniques below so you can determine which one is right for you.
The Roller Method
Many DIYers gravitate towards a texture application method that uses a sea-sponge roller. The slightly abrasive surface of this roller is great for producing stuccoed and slightly raised bumps (a.k.a. “Popcorn” style). Keep in mind, however, that unless you have a ladder, it will be difficult to achieve the same effect on ceilings and high sections of drywall. When you’ve finished the number of coats you want to apply, smooth the edges of the still-wet drywall mud with a knife.
The Stomp-Knockdown Method
For a more rugged and abstract look, the stomp-knockdown method is a perfect choice. Using a special brush, you’ll alternate between applying the drywall mud like paint and “stomping” the brush against the wall. With each smack and stroke, you’ll slightly alter the appearance and height of the mud. As you would with the roller method, be sure to smooth edges and higher areas of the textured surface with a knife once finished.
The Texture Sprayer Method
For this technique, you’ll need a specialized tool called a drywall texture sprayer. These machines use compressed air to propel texturing materials through a hose and out of a handheld nozzle. You can explore some of the best options in the texture sprayer market by visiting our products page at American Spray Technologies. We recommend our airless portable sprayer, the Kodiak M2!
Although machines certainly make drywall texturing a heck of a lot easier, there are still a few factors you’ll need to consider as you undertake the project. The graininess of the textured paint you select will necessarily influence the type of nozzle size you need, and the air pressure power (i.e. the PSI) of your unit will affect both the rate at which you can spray and the materials you can administer. Lastly, textured paints come in a more limited variety of hues than traditional wall paints, so once your texture has been applied and has dried, you may want to go back over it with a few coats of color — but don’t use a brush! The ridges of your newly textured wall won’t take well to the fibrous hairs of a paintbrush. Instead, use a sponge, a roller, or your spray machine. This ensures even distribution of color and more efficient drying time.
Final Recommendation: Get Random!
When you’re texturing drywall, it can be easy to get caught up in the intricacies of technique and sticking to a certain pattern you may have envisioned. But as strange as it may sound, you’ll achieve a better and more artistic outcome from your project if you apply drywall mud in a randomized way. Getting too repetitive with your rolling, stomping, or spraying will leave the whole wall looking flatter than it did to begin with. So have fun and try not to focus on perfection — when it comes to drywall texture, it’s the irregularity that gives it true personality.
Ready to Get Started?
For a quick and easy start to your drywall texturing project, your best bet is a spray rig from American Spray Technologies. Our Kodiak M2 is one of the best portable airless sprayers on the market, and it can be used not only for textured paint, but traditional wall paints and spray paints too! For more information on specs, contact us or watch our video collection of AST Kodiaks in action on YouTube.